UPDATE OCTOBER 2013
Here is all the stuff you need to do dual extrusion with the Ultimaker and Kisslicer:
This contains:
-Marlin Firmware (its all edited, just upload it to your Ultimaker, note: this firmware still has the “UC wheel moving wrong way” bug)
-Kisslicer executable (latest version for WIN x64 – if you need another just go to Kisslicer website)
-Kisslicer configuration files (these do NOT work for anything other than KS 1.1.0.14 onwards)
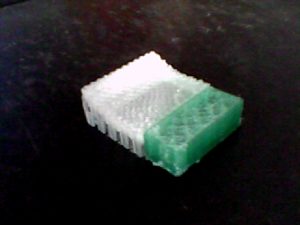
-Test sample STL and pics of what it should look like
I was going to print a nice test piece to show here, but my Extruder #1 heater cartridge finally totally failed after a short period of illness. So no
dual printing for me until I have another one from Ultimaker.
**** TO USE THIS FIRMWARE YOU NEED TO OPEN, COMPILE AND UPLOAD USING ARDUINO IDE SOFTWARE****
(this is really easy and is explained later on this page)
Process of modifying the machine and firmware:
So first some pics on making own 2nd extruder unit, because the wooden parts cannot be bought from Ultimaker.
My target for this has nothing to do with multi-colour, just to allow the support
to be printed in something I can dissolve with solvent or water. (so ABS or PVA).
The new extruder is mostly just the old 3 plates joined together. But has a nice feature which is a thread integrated into the ExtruderPLate_Solid_07-04-2013 so that you can thread in a bowden retainer.
I also modified the V2 extruder upgrade I got from UM, glued in an M3 thread and used the same stud and wingnut arrangement that the original Bertho mod used (which I much prefer as you will always have maximum thread engagement no matter what spring preload you choose).
I also put 4x 0.6mm thick washers inside to space out the plates, so that I could use a ball bearing instead of “ball bearing and delrin ring”. So I just pressed the ball bearing over the tiny one that comes with the upgrade. This should offer more longevity. Have seen some pics of failed delrin rings on the forum elsewhere. The bearing is a standard Ø16x8x5mm “deep groove” ball bearing.
Credit for big gearwheel goes to Mooncactus, http://www.thingiverse.com/thing:25501
However, he decided not to add the little hole that the standard one has…so its a pain to
screw in the stepper motor….oh well.
I now have to make a new printhead fan duct that will fit the 2nd nozzle, then wire it all in – then see how to mod the firmware and so on.
One issue to should fix is that the extruder plate above doesnt really fit the bigger ball bearing instead of the delrin ring for putting pressure on the
filament agains the knurled wheel. So if you intend to print it, perhaps modify the CAD file. I will upload a new one…
Firmware
The Ultimaker generally uses Marlin firmware. Which can be downloaded here:
https://github.com/ErikZalm/Marlin
You can generally find good tutorials online on editing and uploading this stuff, however most seem to start at a technical level which is
just a fraction too high for someobody with no programming knowledge or experience with messing around with Arduino firmware (Arduino is the name
of the electronics board that is responsible for taking the G-code from the “Slicer” software and turning that into commands to move the motors around
and heat the thermocouples correctly etc).
So just an introduction for people who (like I did) have basically no idea what its about.
HARDWARE (chips, circuitboards, resistsors, connectors, MOSFETS) – ARDUINO Electronics Board (Mega 2650 for an Ultimaker)
FIRMWARE (software code that is permanently stored on a chip, attached to the hardware) – MARLIN
SOFTWARE (software code that is loaded (temporarily) onto a chip attached to the hardware) – a “SLICER” (like Kisslicer) then the G-CODE
To edit your firmware (properly) you need to open it with the Arduino IDE program. So download it here:
http://arduino.cc/en/main/software (I downloaded Arduino 1.0.4 Windows)
Now go to the 2nd last link above to get the latest Marlin Firmware from Github (which is really non-user friendly when you first try it…)
just click on ZIP icon which gives tooltip “download this repository as a ZIP file”.
Obviously now unzip this on your desktop or whatever.
Now you CAN sit and put the Arduino folder is a nice location, and put the Marlin folder correctly into the “firmware” folder inside the Arduino folder..etc etc.
But you dont HAVE to…so I didnt.
The firmware is confusing at first because there are so many files, and its really unclear what is generally going on, however there is a sort if MASTER file which
when opened gives you access to everything.
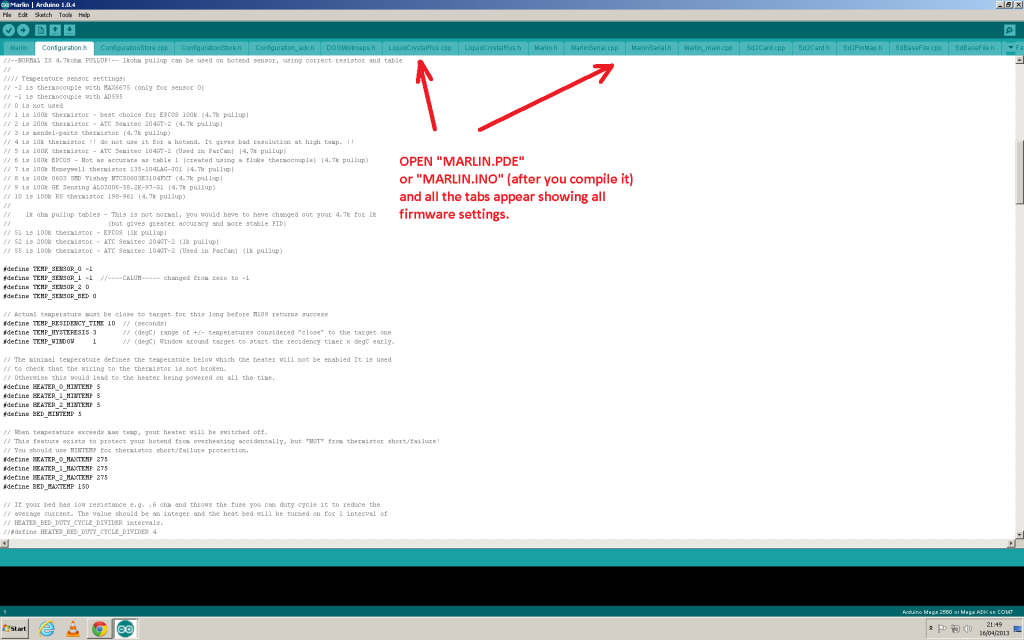
So open Arduino, and open the file from Marlin folder which will be called something like “Marlin.pde”. The important bit is that its the ONLY file with the extension .pde
When you open this, it automatically opens ALL the other firmware files – and shows them as a list of tabs at the top of the window in Arduino GUI.
You will need to edit the following things in Marlin firmware:
Feature Which Tab its in when opened in Arduino
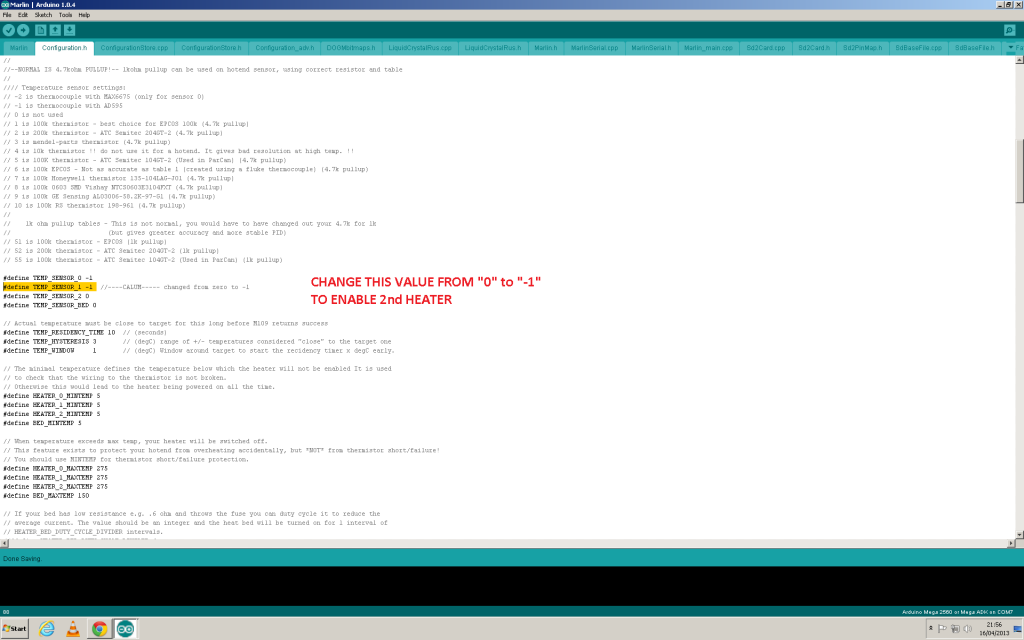
1) Turn on the 2nd heater (Configuration.h)
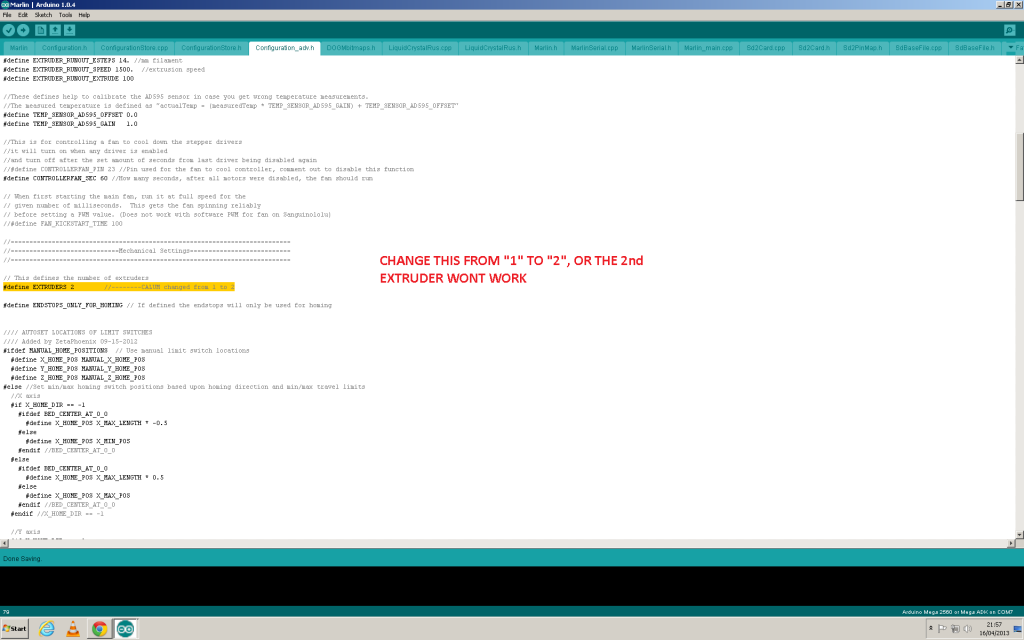
2) Turn on the 2nd extruder (Configuration_adv.h)
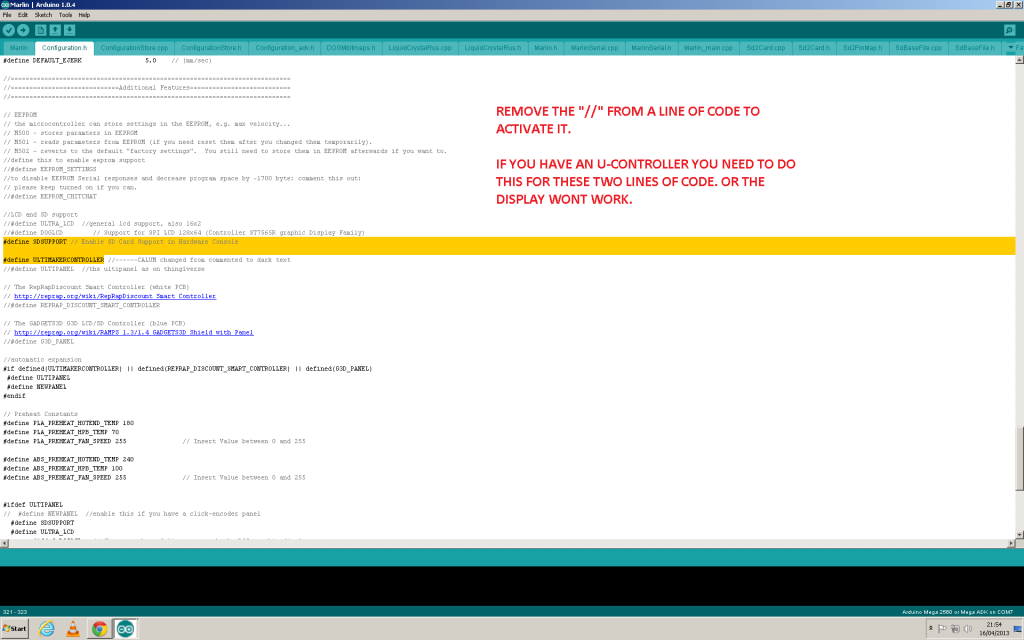
3) Turn on the Ulticontroller (if you have one) (Configuration.h)
4) Turn on the SD Card support (if you have #3) (Configuration.h)
Open up Arduino and make sure you select the right board, or it wont work when you compile the code later on.
Find and open either the Marlin.INO or Marlin.pde file. These are the “master” files that will open all the rest of the files automatically for you.
Now enable the 2nd extruder
Enable the Unticontroller and SD Card (if you have them)
Enable 2nd Heater
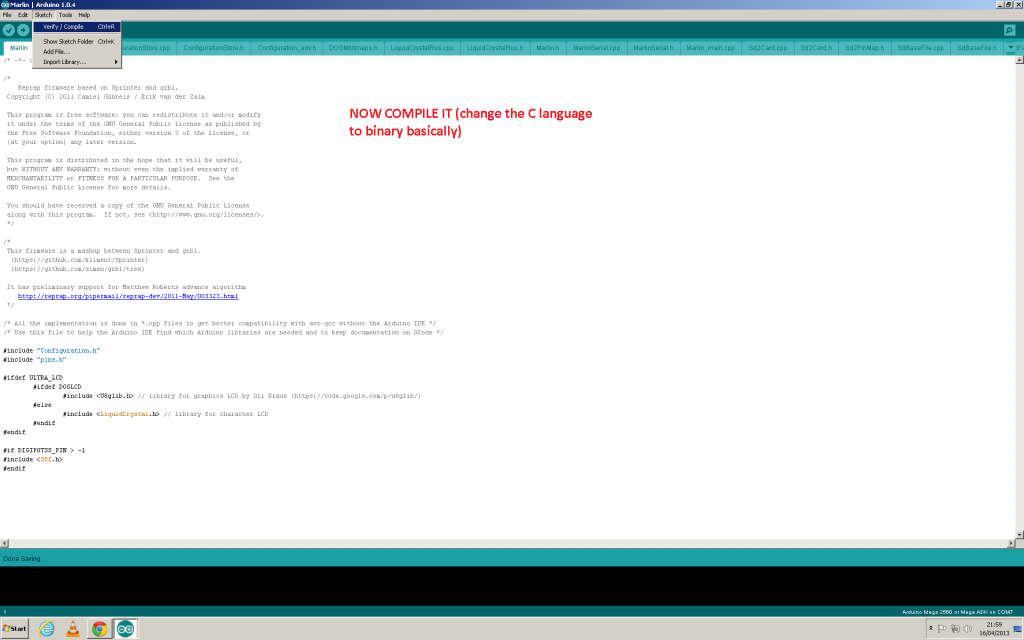
So now compile the code (just one mouseclick !), then go to FILE>UPLOAD
If you sucesfully upload it, you will hear a faint click from the Utimaker – once at the start of upload and once again when its done. If it doesnt make a sound, check your setting in Arduino software to make
sure you have the right COM port selected (in other words..try the other one)
Making the GCODE for the dual extruder setup
At the moment I have only sucessfully been able to print dual extrusion using KISSLICER Pro & CURA ver 12.12A – the later ones have some sort of bug at the moment (up to ver13.03).
Kisslicer is not open source, and the pro version costs money. However its a very very small charge to pay and the software does everything I want…so honestly I dont care that its not
opensource.
Kisslicer is a generic slicer program, its not setup for the Ultimaker when you download it – so you would need to change the settings, and also add some g-code so Kisslicer knows how
tell the Arduino how to use the 2nd extruder properly. But all this is done for you with the configuration files in the ZIP file at the top of this page. All you have to do is
use whats in the ZIP folder and it will all work automatically!


I have done as you have shown. Still error. I really do not know what is that. Could you please guide?
Arduino: 1.5.5 (Windows 7), Board: “Arduino Mega or Mega 2560, ATmega2560 (Mega 2560)”
temperature.cpp:1055:1: error: pasting “DIO” and “-” does not give a valid preprocessing token
temperature.cpp:1055:1: error: invalid suffix “_RPORT” on integer constant
Hi,
https://github.com/ErikZalm/Marlin/issues/619
https://groups.google.com/forum/#!msg/deltabot/HyK47vjx-g0/ZUnoaqnR7RgJ
https://groups.google.com/forum/#!msg/ultimaker/ikVeraOyNmM/8U9x8XnFXawJ
You have done something wrong compiling your firmware. Since you provide no details about your machine or your modifications, I cannot help you more.
Probably you were using an older firmware an modifying it, try downloading the very latest one, or just copying mine – instead of modifying an old one
You actually make it seem so easy with your presentation but I find this matter
to be really something that I think I would never understand.
It seems too complex and extremely broad for me. I am looking forward for your next post, I will try to get the hang of
it!
If you have specific problems, you can ask. If you are prepared to be patient, its all possible.